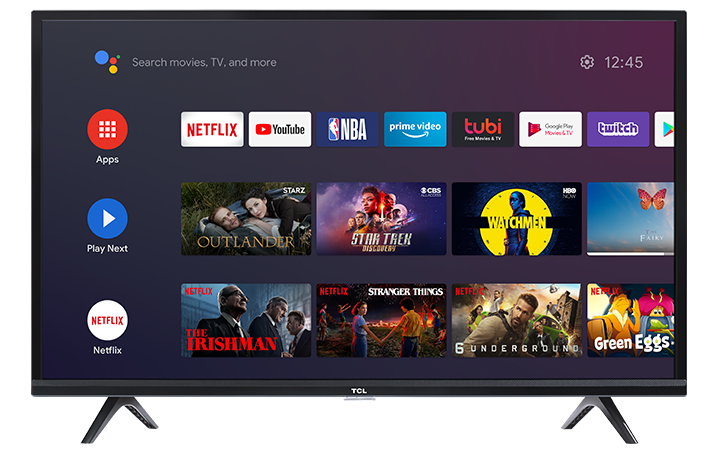
You can adjust the picture and sound by accessing the TV settings menu.
- Press
 on the TCL TV remote to display the TV settings menu.
- Press ▲/▼ to select the desired item, then press OK/►to enter the corresponding sub-menu options.
- In sub-menus, press ▲/▼to select menu options, then press OK/►to enter the option list, the adjustment interface, or the corresponding sub-menu.
- Press
 to return to the previous menu.
- Press
 to close the menu.
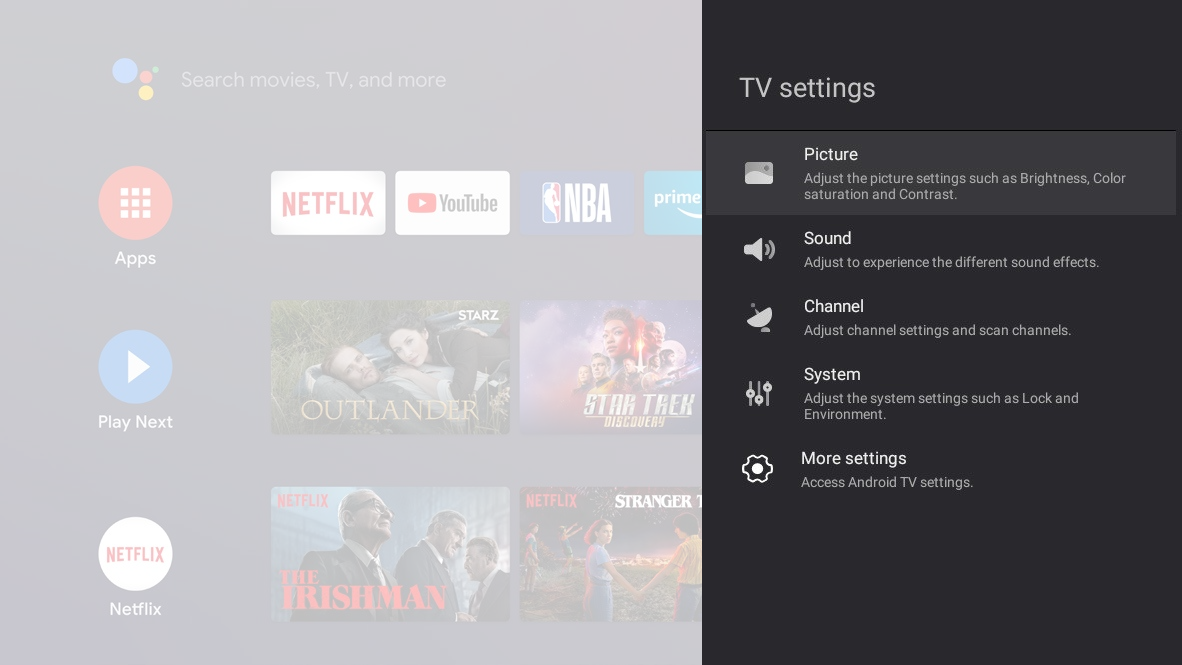
Note: You can also press on the TCL TV remote, select TV settings and press OK to enter the TV settings menu. Some options may not be available for certain input sources.
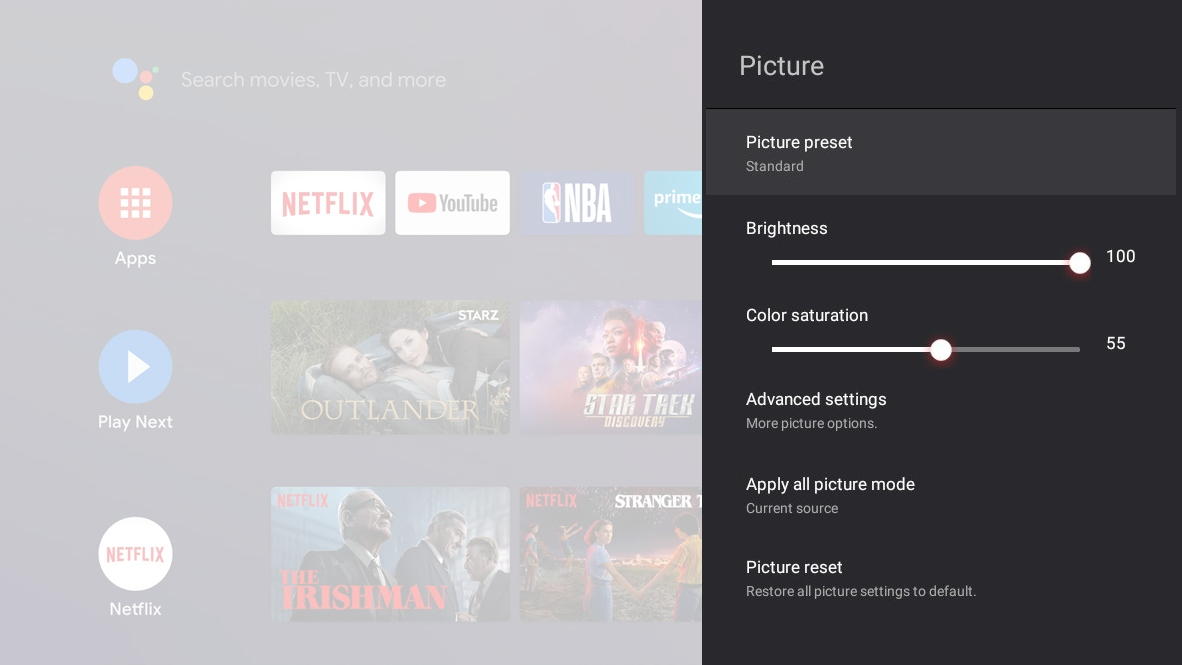
Picture Settings
The picture menus are used to adjust the picture settings according to your preference and the type of content you are watching. The picture menus can be set up at every broadcasting type and every input source.
- Press
 on the TCL TV remote, select Picture and then press OK.
- Press ▲/▼ to select the picture item you want to set, and then press OK.
- Set the picture items to your preferences one by one.
Note: The available options may vary depending on the picture mode you set.
-
Picture preset: Select a picture mode optimized for different viewing conditions. Press ▲/▼ to select an option and then press OK.
-
Brightness: Adjust the luminance level of the screen. Press ◄/► to set the preferred brightness.
-
Color saturation: Adjust the color saturation level of the picture. Press ◄/► to set the preferred color saturation.
-
Advanced settings:Adjust more picture options.
-
Brightness settings: Adjust the brightness settings such as Contrast and Black level.
-
Color: Adjust the color such as Color saturation and Tint.
-
Clarity: Adjust the clarity such as Sharpness and Digital noise reduction.
-
Screen settings: Adjust screen settings such as Screen mode.
-
Apply all picture mode: Select whether to apply the picture settings to the current source or to all sources. Press ▲/▼ to select an option and then press OK.
-
Picture reset: Restore all picture settings to default. Press ▲/▼ to select OK and then press OK.
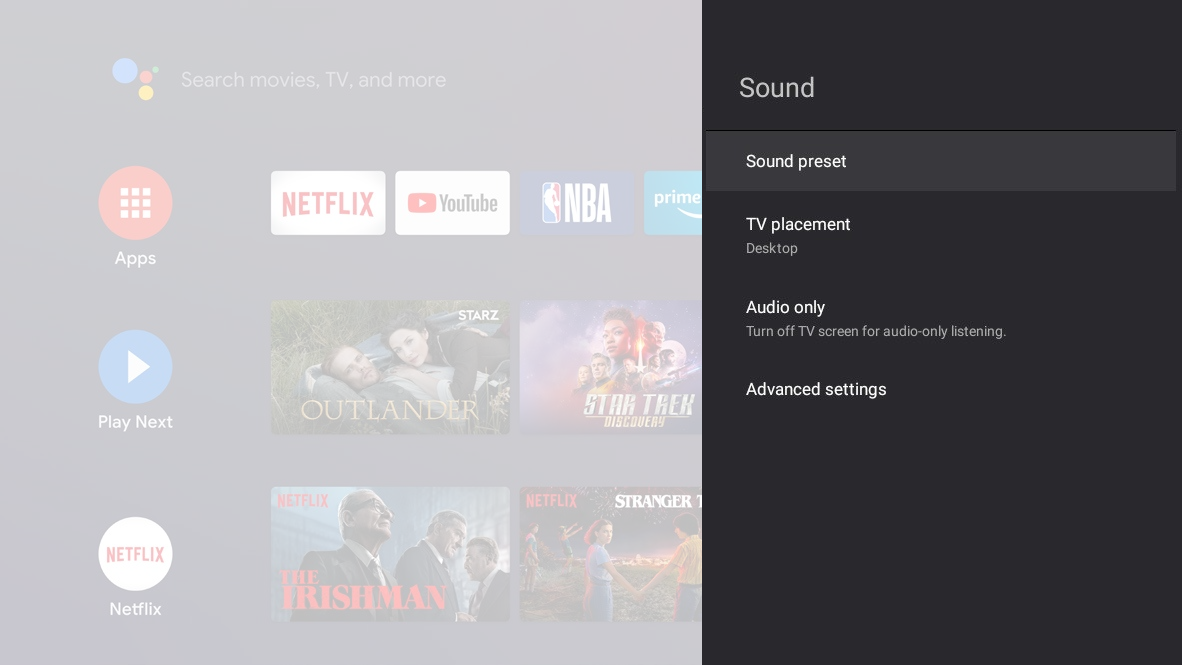
Sound Settings
The sound menus are used to obtain the best sound settings to optimize audio output. The sound menus can be set up at every broadcasting type and every input source.
- Press
 on the remote control, select Sound and then press OK.
- Press▲/▼ to select the sound item you want to set, and then press OK.
- Set the sound items to your preferences one by one.
-
Sound preset:Select a sound mode optimized for different viewing conditions. Enter the Soundmode menu and press ▲/▼ to select an option and then press OK. Select Reset to restore all sound preset to factory defaults.
-
TV placement: Select where the TV is located. Press ▲/▼ to set your TV placement, and then press OK.
-
Audio only: Select to switch off the TV display and only listen to the sound from the TV. The TV screen will turn off in about 10 seconds. In audio only mode, press any key to turn on the TV screen again.
-
Advanced settings:Adjust more sound options.
-
Menu sounds: Select whether to play a sound when pressing a button from the remote control to select menu options.
-
Balance: Adjust the level of sound sent to the left and right speakers.
-
Auto Volume control: Suppress volume change by increasing low volume and reducing high volume automatically.
-
Digital audio out: Select the digital audio output format.
-
Digital audio out delay: Correct timing mismatches between the audio and video tracks. This option is only available when Digital audio out is set to PCM.
Channel Settings
The channel menus are used to scan and maintain your channels, and access the Electronic Program Guide. The channel menus are only available in TV mode.
- In TV mode, press on the remote control, select Channel and then press OK.
- Press▲/▼ to select the sound item you want to set, and then press OK.
- Set the sound items to your preferences one by one.
- Press ▲/▼ to select the channel item you want to set, and then press OK.
- Set the channel items to your preferences one by one.
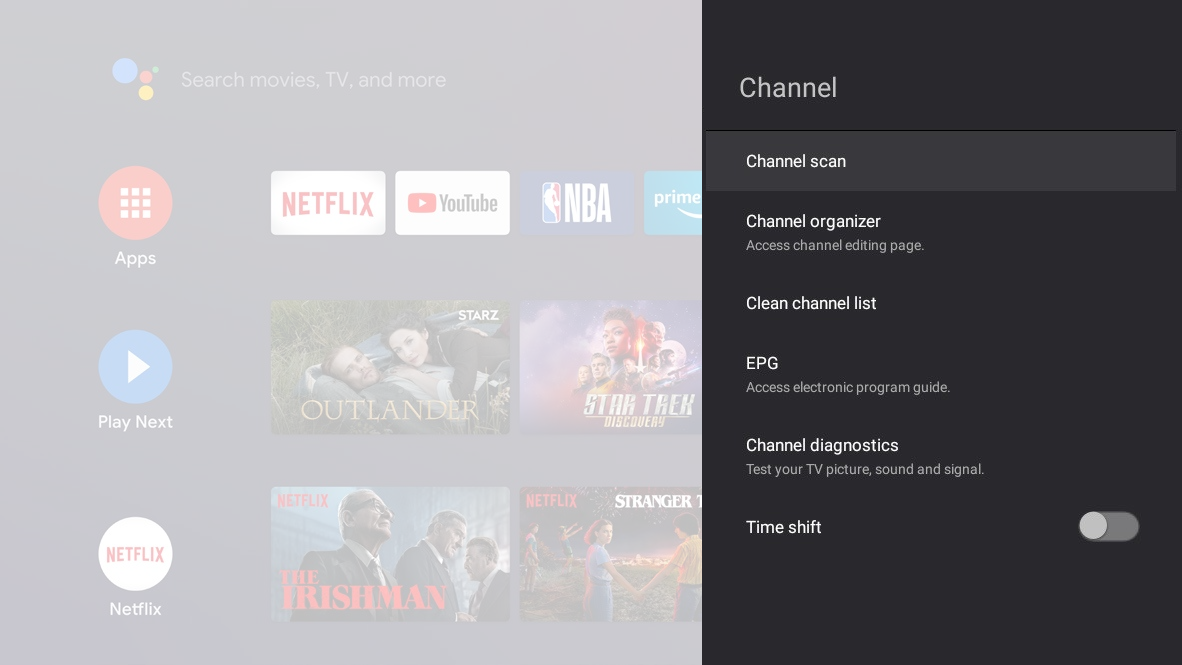
-
Channel scan: Search channels automatically or manually.
-
Country/Region: The TV installs and arranges channels according to your country or region. Press ▲/▼ to select Country/Region, and press OK/► to enter. Enter the default password 1234 or your own password in case you have changed the password in the System > Lock menu. Press ▲/▼ to select your country or region and press OK to confirm.
-
Automatic search: Press ▲/▼ to select Automatic search and press OK/► to enter. Press ▲/▼/◄/► to select Tuner mode and other options, then press ▼ to select Search and press OK to start scanning channels.
-
Manual scan: Scan channels manually by entering parameters such as channel number or frequency.
-
Channel organizer: After the automatic search, channels are arranged in a preset order. If you want to edit the channel list, select Channel organizer and press OK/► to enter.
-
Clean channel list: Reset all channel lists.
-
EPG (Electronic Program Guide): Access electronic program guide.
-
Channel diagnostics: Test your TV picture, sound and signal.
-
Time shift: Press OK to toggle this function on or off.
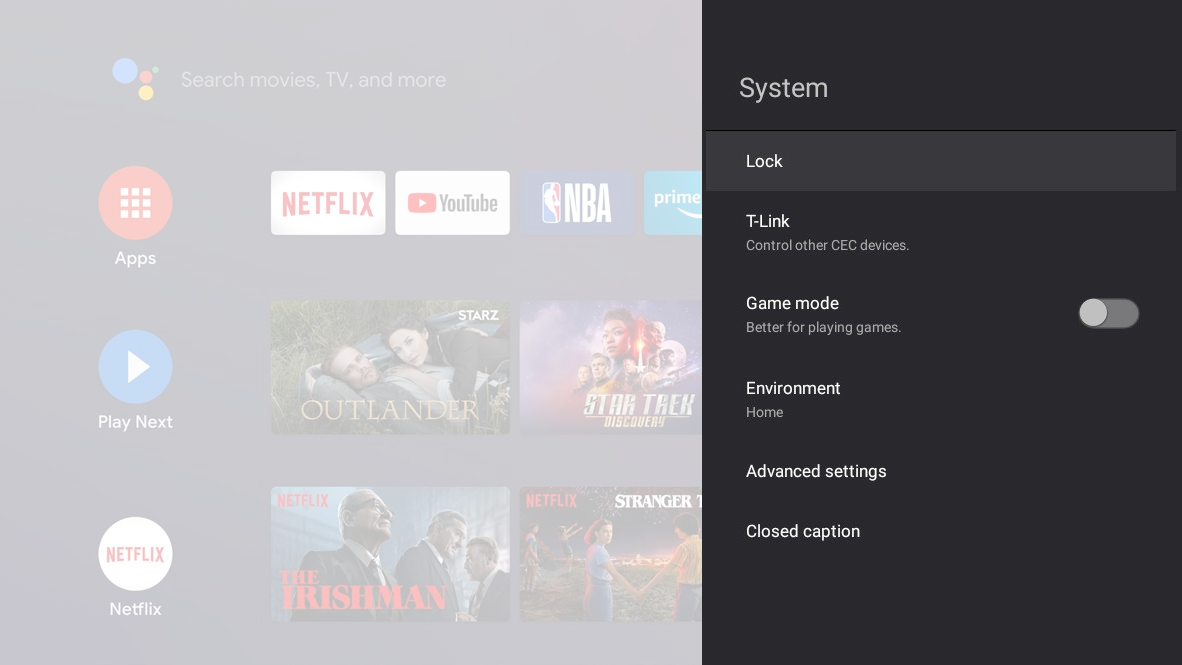
System Settings
The system menus are used to adjust the system settings for your TV.
- Press
 on the remote control, select System and then press OK.
- Press▲/▼ to select the system options you want to set, and then press OK.
- Set the system options to your preferences one by one.
-
Lock: You can set the parental control feature to restrict the viewing of programs by children under the specified age limit. You must set a four-digit password before using the parental control feature. Password will be required to watch a program subject to watching restriction. Enter the default password 1234 to access the sub-menu.
-
TLink: Use this function to search for CEC devices connected to the HDMI sockets in your TV and enable auto power on and auto standby between the TV and CEC devices.
-
Auto power on: Enables the TV to automatically power on when you power on a CEC device (e.g. DVD) with the device’s remote.
-
Auto Standby: Enables all CEC devices to automatically go to the standby mode when you turn off the TV with the TV remote.
-
Game mode: Better for playing games. Press OK to toggle this function on or off.
-
Environment: You can choose the environment in which your TV is used. Press ▲/▼ to set your environment, and then press OK.
-
Advanced settings: Adjust more system options.
-
LED indicator: You can set the LED indicator to be flashing, off, or on when the TV is in standby mode. Press ▲/▼ to select your option, and then press OK.
-
Closed caption: Many programs are encoded with closed captioning information, which allows you to display the audio portion of a program as text on the TV screen.
Click here to learn how to change your Android OS Settings.